Drywall 101: How to Patch Drywall, Cracks, and Nail Pops Like a Pro
- Nest Alpha

- Dec 10, 2025
- 5 min read
It happens to the best of us. You were moving a sofa, and the corner caught the hallway wall. Or maybe you removed a gallery wall of photos, leaving your living room looking like Swiss cheese. Or perhaps you just noticed a mysterious hairline crack appearing above a doorframe.
Drywall is the skin of your home. It’s smooth and clean, but unfortunately, it is also fragile.
The good news? Drywall repair is one of the most forgiving DIY skills you can learn. You don’t need power tools or expensive contractors. With a little patience and the right technique, you can make those blemishes vanish.
This guide covers how to patch drywall for the three most common issues homeowners face: the annoying nail pop, the accidental doorknob hole, and the settling crack.
Stop! Read This Before You Patch a Crack
Before you grab the spackle, you need to play "House Detective." Not all cracks are created equal.
Is it Cosmetic or Structural?
Cosmetic (Settling): Thin, straight hairline cracks (usually vertical) near windows or doors are common in new homes as the wood framing dries out and settles. These are safe to patch.
Structural (Danger): Large, jagged, diagonal cracks, or cracks that are wider than a dime (1/8 inch) are red flags.
Warning: If your crack is diagonal, stair-stepped, or growing rapidly, patching it is like putting a band-aid on a broken leg. You may have foundation issues. Read our guide on [Foundation Inspection Costs & Signs of Failure] to understand the difference between a settling crack and a structural disaster before you proceed.

Tools of the Trade
You don’t need a hardware store’s worth of gear. For 90% of repairs, this is your kit:
Spackle or Joint Compound: Use "Lightweight Spackle" for small nail holes (it dries fast). Use "All-Purpose Joint Compound" for larger patches and cracks.
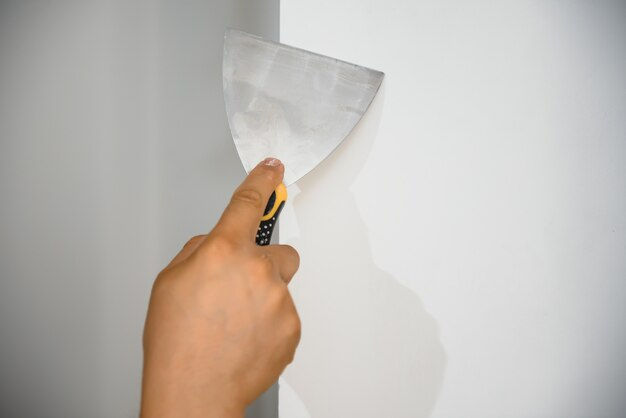
Putty Knife: A 4-inch or 6-inch blade is versatile.
Sandpaper: A fine-grit sanding sponge (220 grit) works best.
Mesh Wall Patch: For holes larger than a coin.
Utility Knife: For cleaning up ragged edges.
Don't have these? Check our Essential Tools for New Homeowners checklist to get started.)
Level 1: Fixing Nail Pops and Pinholes
The Problem: You see a small, round bump on the wall (a nail pop) or tiny holes left over from picture hooks.
The Fix: Many people make the mistake of just painting over these. Don't do that—the divot will still show.
The Prep: If it’s a nail pop (a bump), take a screwdriver or hammer and gently tap the nail/screw back into the stud so it is slightly recessed below the wall surface.
The Fill: Take a dime-sized amount of spackle on your finger or putty knife. Press it firmly into the hole.
The Swipe: Do one swipe across to level it off. Don't overwork it. Leave it a little "proud" (raised) because it shrinks when it dries.
The Sand: Once dry (usually 15-30 minutes), lightly sand it flush with the wall.
Level 2: How to Patch Drywall Holes (Up to 4 Inches)
The Problem: A doorknob slammed into the wall, or someone tripped and put an elbow through the drywall.
The Fix: For holes between 1 and 4 inches, you don't need to cut a new piece of drywall. You just need a "patch kit."
Clean the Wound: Use your utility knife to trim away any loose paper or hanging gypsum from the edges of the hole.
Apply the Mesh: Buy an adhesive aluminum mesh patch (sold at any hardware store). Peel the backing off and stick it over the hole.
Coat #1: Apply joint compound over the mesh. Press it through the holes of the mesh to secure it.
Feathering (Crucial Step): The biggest mistake beginners make is keeping the patch too small. You need to "feather" the edges—meaning you spread the compound out 2–3 inches wider than the patch, making the layer thinner as it goes out. This blends the hump into the wall so it disappears.
Sand & Repeat: Let it dry, sand lightly, and apply a second, wider coat if you can still see the mesh grid.
Level 3: Fixing Settling Cracks (The "V-Notch" Secret)
The Problem: A recurring hairline crack above a doorway.
The Fix:If you just smear spackle over a crack, it will come back in a month. To learn how to patch drywall cracks permanently, you need to use the "V-Notch" method.
Carve the V: Take a utility knife (or a 5-in-1 tool) and carve out the crack to make it wider, in the shape of a "V".
Why? This increases the surface area for the compound to grab onto.
Tape It: Apply a thin layer of compound, then press a strip of paper tape (not mesh) over the crack.
Pro Tip: Mesh tape is weak and stretches. Paper tape is stronger and prevents the crack from reopening.
Top Coat: Cover the tape with another layer of compound, feathering it out 4-6 inches on either side.
Sand: Sand smooth once dry.
The Final Step: Texture and Paint
You’ve fixed the hole, but now you have a smooth white splotch on a colored wall.
Dealing with Texture:
If your walls have "Orange Peel" or "Knockdown" texture, a smooth patch will stand out. Buy a can of Spray Texture (Homax makes great ones). Shake the can, test it on a piece of cardboard to adjust the spray pattern, and lightly mist your patch to match the surrounding wall.
Painting: Fresh spackle sucks up paint like a sponge. Always apply a coat of Primer to the patch before your colored paint. If you skip primer, the spot will look duller than the rest of the wall (a defect called "flashing").
Smooth Walls, Happy Home
Learning how to patch drywall is a rite of passage for every homeowner. It saves you the $200 minimum charge a handyman would bill for a 30-minute job.
Remember the golden rule: Preparation is key. Check if the crack is structural, clean the hole, and feather your edges. With these steps, your walls will look as good as the day you moved in.
FAQs
Q: What is the difference between spackle and joint compound?
A: Spackle is best for small holes (nail pops); it dries fast and doesn't shrink much. Joint Compound (or "mud") is best for larger repairs, taping cracks, and skimming. It shrinks more but is stronger and easier to sand.
Q: Why does my patch look like a hump on the wall?
A: This happens when you don't "feather" the edges enough. To fix it, sand the edges down further, or apply a much wider layer of compound (10-12 inches wide) to gradually blend the raised center into the wall.
Q: Can I use toothpaste to fill nail holes? A: In a college dorm? Maybe. In a home you own? No. Toothpaste cracks, attracts ants, and paint doesn't stick to it well. Spend the $5 on a tub of spackle.


Comments